Overriding Guest Verification
The Verification Override feature allows you to bypass, reset, or manage verification steps for specific guests when unique circumstances arise — such as trusted repeat visitors, technical issues, or steps that need to be retried. This ensures a smooth check-in process while maintaining flexibility for special cases.
Where to find verification details for each guest
Section titled “Where to find verification details for each guest”- Your verification rules are located under Portals > Verify.
You can assign specific verification rules to your portal.
The active verification rules assigned to the portal of the property where the guest booked will automatically apply to those guests.
- To view a guest’s verification rules, click on their reservation to open the reservation panel, then scroll down to the verification section to see the active steps and their statuses.
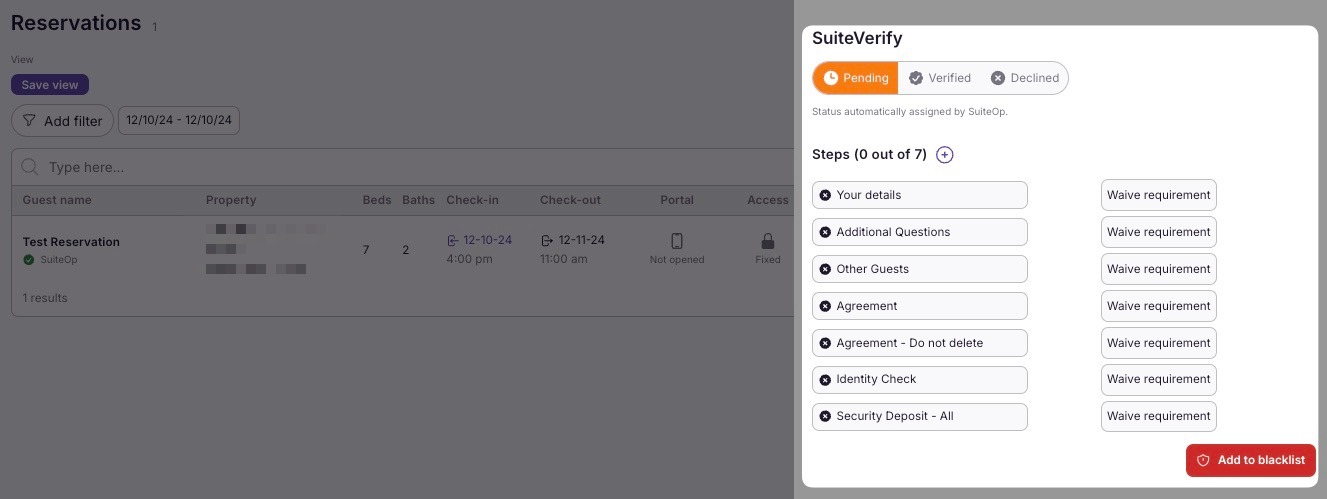
How to waive individual verification steps
Section titled “How to waive individual verification steps”Here are a few examples of why you might need to waive a verification step:
- Trusted Repeat Guests — Guests who have previously completed verification and are known to the host.
- Technical Difficulties — When the guest experiences issues completing the verification process online.
- Last-Minute Bookings — When time constraints prevent the full verification process.
- Referral or Direct Approval — Guests referred by a trusted party or approved directly by the host.
- In-Person Check-In — Verification is completed manually upon the guest’s arrival.
To waive a step:
- Open the guest’s reservation and scroll to the verification section
- Find the step you want to waive
- Click the Waive button next to the step
- The step will be marked as waived, and the guest can proceed without completing it
How to reset a verification step
Section titled “How to reset a verification step”If a guest’s verification step has failed, encountered an error, or needs to be retried, you can reset it to allow the guest to start over.
To reset a step:
- Open the guest’s reservation and scroll to the verification section
- Find the step you want to reset
- Click the Reset button on the step
- The step returns to Pending and the guest can reattempt it from the guest portal
Common reasons to reset a step:
- Authority reporting failed — The submission to the local authority encountered an error and the guest needs to retry
- Incorrect information — The guest submitted wrong details and needs to re-enter them
- Technical issues — A system error prevented the step from completing correctly
- Testing — You need to re-run a step during setup or troubleshooting
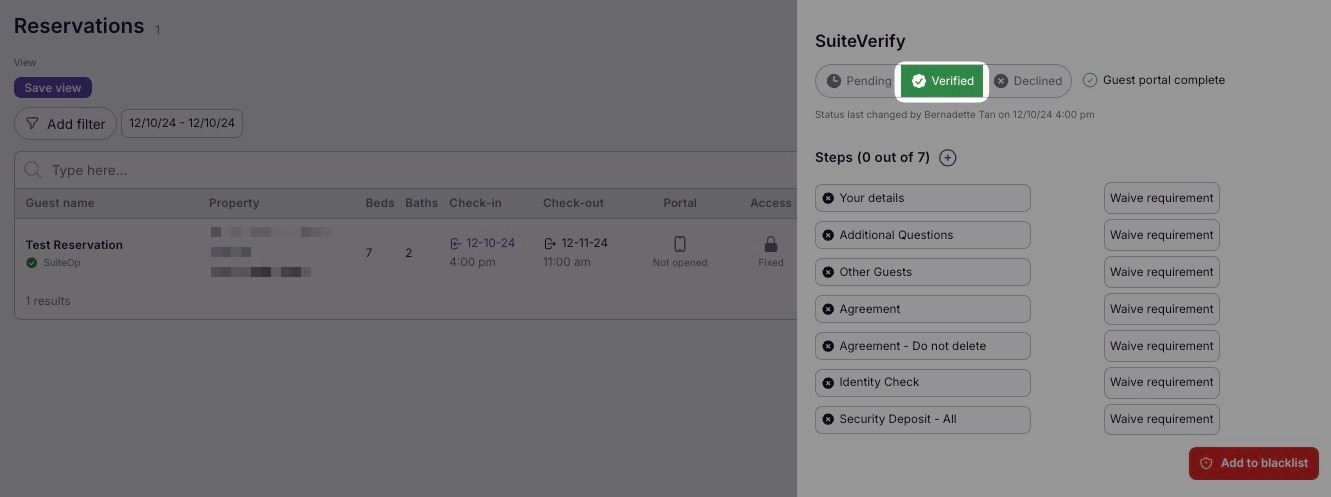
How to approve a guest manually
Section titled “How to approve a guest manually”Approving someone manually may be necessary in situations such as:
- Trusted Repeat Guests — The guest has stayed before and already established trust.
- Technical Issues — The verification system is temporarily unavailable or malfunctioning.
- Exceptional Circumstances — The guest provides valid reasons for not completing standard verification steps.
- Direct Host Approval — The host has personal knowledge of the guest or receives a trusted referral.
- Time-Sensitive Bookings — A last-minute reservation requires immediate approval.
To manually approve a guest, navigate to their reservation and click the Verified button. This action bypasses all verification requirements, granting the guest access to the portal with all property details and codes.
How to approve reservations in Manual Review
Section titled “How to approve reservations in Manual Review”There are also instances where a verification needs to be approved manually after a guest completes the verification steps but is flagged for manual review.
- On the guest reservation, under the verification section, you may encounter a verification that requires manual review. A purple icon labeled Review will appear. There are several reasons why manual review is necessary, and SuiteOp will provide a brief explanation of why it is needed.
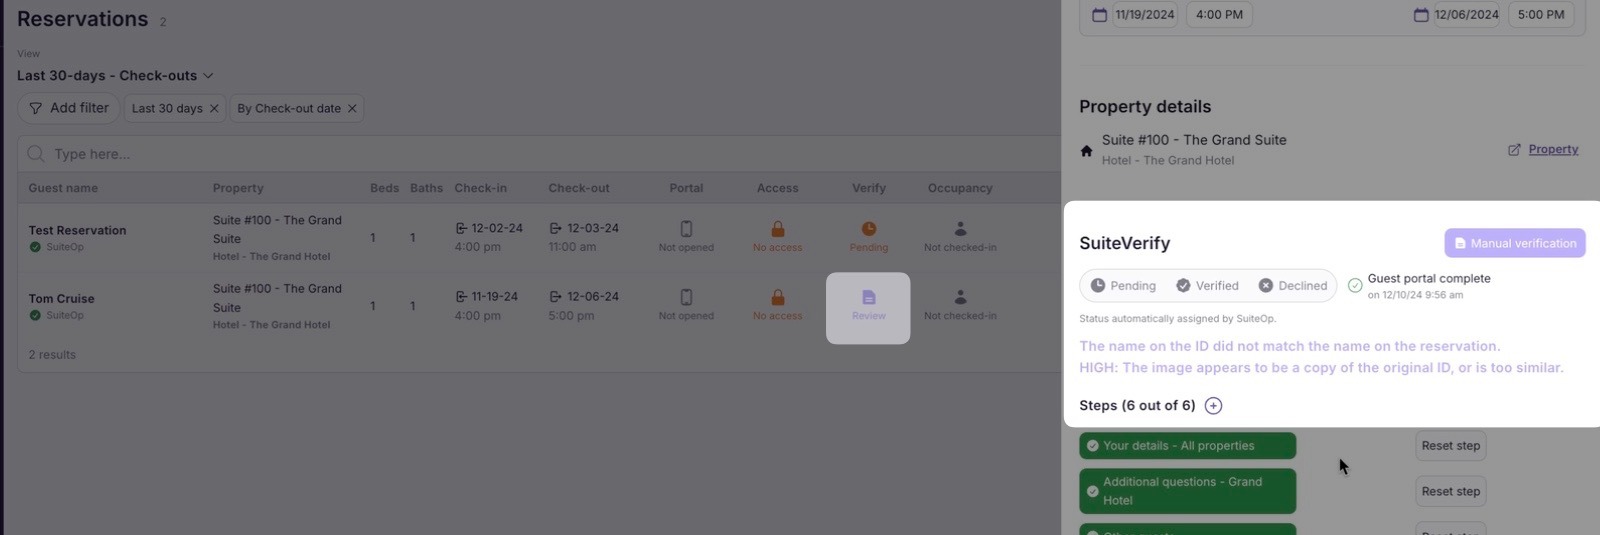
On the example above, it shows that:
“The name on the ID did not match the name on the reservation”
“HIGH: The image appears to be a copy of the original ID, or is too similar”
- Next, go to Identity Check to verify if the photo on the ID matches the selfie the guest submitted. Then, check the details to ensure the name on the ID matches the name of the person who made the reservation.
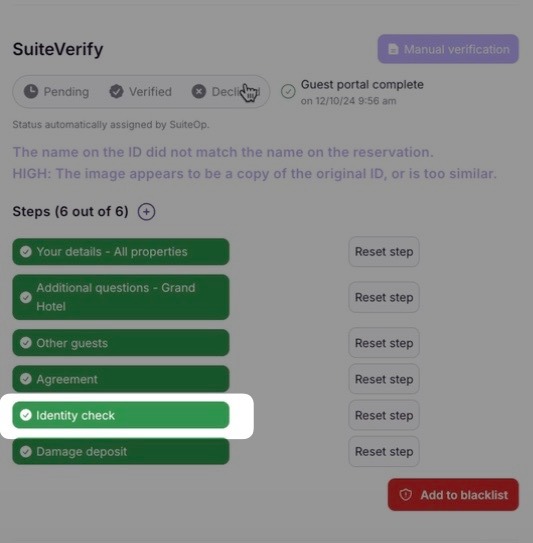
- Depending on your company’s policy, you may need to decline the verification if the ID information does not match the details submitted.
Related articles
Section titled “Related articles”- Verification Statuses — Understand the Pending, Verified, and Review statuses
- Setting Up Guest Verification — Configure which verification steps are required
- Authority Reporting with GuestAdmin — Set up automated authority reporting