Managing Tasks
View your tasks
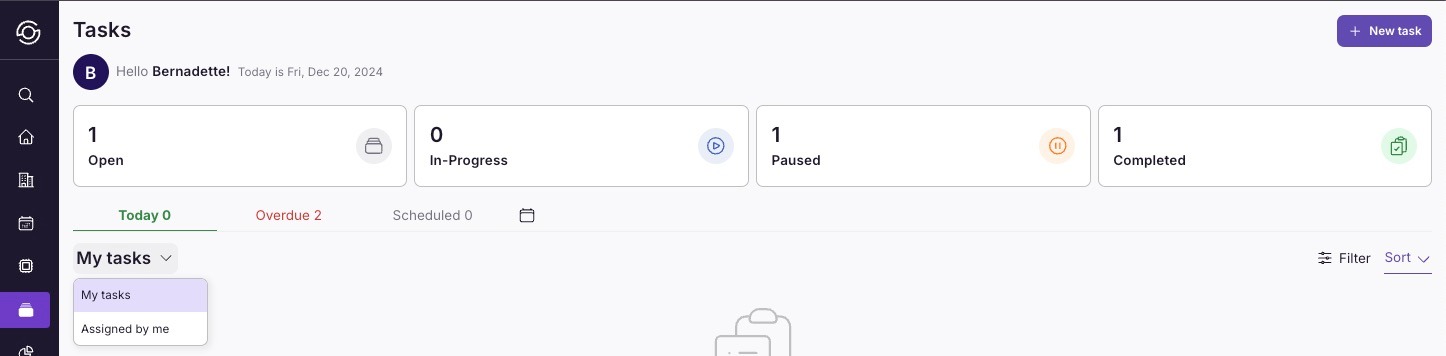
Section titled “View your tasks”View tasks assigned to you and tasks assigned by you.
- Go to Tasks > My Tasks.
From here, you can:
- View an overview of your tasks for the day.
- Use the filter and sort options on the right side of the page to customize your view.
- Check overdue and scheduled tasks for better task management.
All tasks across properties
Section titled “All tasks across properties”For a portfolio-wide list of every task, go to Tasks > All Tasks.
The page has two view modes, toggled at the top right:
- Tasks — a sortable, paginated table of every task matching the active filters. Use this when you need to scan rows, sort by status or due date, or perform bulk actions.
- Properties — the Property Readiness Dashboard, which groups properties into swimlanes by urgency and shows their readiness, next check-in, and open tasks at a glance.
Use the filter bar (department, status, priority, assignee, property, unassigned, has reservation) to narrow the list, and Save view to keep recurring scopes one click away.
Bulk actions on the task list
Section titled “Bulk actions on the task list”When you’re in the Tasks view, select the checkbox on one or more rows to act on several tasks at once. A bulk action bar appears at the bottom of the list showing how many tasks are selected, along with the actions you can apply.
Selecting tasks
Section titled “Selecting tasks”- Tick the checkbox on any row to add that task to the selection.
- Tick the header checkbox to select every task on the current page.
- If your filters match more tasks than fit on one page, a Select all N matching option appears so you can act on the whole filtered set across pages. Selections are capped at 500 tasks; if you hit the cap, SuiteOp tells you with a toast.
Available actions
Section titled “Available actions”The bulk action bar groups the actions you have permission for. On narrow screens, the actions on the right collapse into a More menu.
- Status — move every selected task to a new status (for example, mark a batch Complete).
- Assign — set the assignee for the whole selection at once.
- Priority — raise or lower priority across the selection.
- Due date — pick a single due date to apply to every selected task.
- Auto-assign — let auto-assignment rules choose the assignee for each task (see below).
- Delete — remove the selected tasks. SuiteOp asks you to confirm before deleting.
Each action shows a short confirmation summarizing what will change before it’s applied.
Bulk auto-assign with review
Section titled “Bulk auto-assign with review”The Auto-assign bulk action runs your auto-assignment rules against the selected tasks so you don’t have to choose an assignee for each one by hand.
The Auto-assign button has a Review before assigning toggle. SuiteOp remembers your choice between visits.
- Review on (default) — stage the proposed assignments as a draft you can check before anything is saved.
- Review off — assign immediately using the rules, with no review step.
Reviewing a draft
Section titled “Reviewing a draft”When review is on, choosing Auto-assign stages a draft directly in the task list — the same table, columns, and filters, with only the Assignee column changed to show what the engine proposes.
-
Trigger Auto-assign with Review before assigning turned on. A banner appears above the list summarizing the draft: how many tasks are ready, how many are reassignments (the proposed person differs from the current assignee), and how many need a pick (the rules couldn’t choose anyone).
-
Scan the Assignee column. For reassignments you’ll see the current assignee alongside the proposed one. For tasks that need a pick, click the cell to choose an assignee yourself.
-
Override any single proposal by clicking its Assignee cell and picking a different team member — useful when you want to keep the engine’s choices but adjust one or two.
-
When the draft looks right, click Assign in the banner to commit. SuiteOp saves only the tasks that have a chosen assignee, clears your selection, and refreshes the list. To back out without saving, click Discard — your selection is kept so you can try again.
View the Task Schedule for the entire team
Section titled “View the Task Schedule for the entire team”To see tasks across the whole team on a calendar, go to Tasks > Calendar.
The schedule is an infinite-scroll calendar — scroll horizontally (or vertically in monthly Property mode) to keep loading more days without paging.
Group by
Section titled “Group by”Two grouping options control what each row represents:
- By Property — one row per property, with tasks placed in the column of the day they’re due. Reservation bars also render across these rows so you can see arrivals, stays, and departures alongside the work.
- By User — one row per team member, showing every task they own across the time range.
Time range
Section titled “Time range”Three time ranges control the column width:
- Day — a single visible day per page, with each property/user column stretched to fill the viewport. Good for densely scheduled days.
- Week — seven-day pages, infinite-scrollable in both directions.
- Month — full-month pages. In By Property mode the months stack vertically; in By User mode they scroll horizontally as a continuous users × days grid.
Navigation controls
Section titled “Navigation controls”- Today — jumps back to the current week or month.
- ◂ / ▸ — step backward or forward one day, week, or month depending on the active range.
Click any task to open its detail sheet, or click an empty cell to create a new task pre-filled with that property/user/date.